Let's Build a Cannon | Traditions Mini Iron Sides Kit | Full Tutorial
Full disclosure, this kit was sent to me by Traditions to build on the channel. I do not benefit from the sale of this kit, I am not asking you to buy one.
We’re start this process by unboxing the kit and making sure all of our components are in the kit. I’ve never had a piece missing from a new kit, but you never know. I check that every part is present by looking at the schematic in the manual and mentally making note of the parts that should be in the box.

Dry Fitting the Mini Ironsides Kit
Like any muzzleloader kit that we’ve put together, we want to go ahead and ‘dry fit’ this cannon kit. Dry fitting simply means assembling the kit without any finish to test fit all the parts, ensuring everything is correct before we apply finish. It’s much easier to make fitting changes with the raw parts than it is to try to patch together finished parts after the fact.
To dry fit the components, I follow the instructions as laid out by Traditions in the manual.

Traditions starts us off by seating the elevating nut in the rear cross brace or axle. I seat this washer by placing the points of the washer down into the axle. I place a piece of scrap wood on top of the washer before tapping it into place with a rubber mallet. The scrap wood in between the mallet and the nut prevents any marring on the washer or the wood axle.


At this point in the video, I get a little distracted, but for the sake of this written tutorial, I will move forward.
Move forward by mounting the axles to the side plates using the long pan headed screws included in the kit. My kit had predrilled holes for these screws so I ignored the manuals direction to pre drill the holes using a #54 drill bit.

Be sure you mount the side plates to the axles with the predrilled holes for the washers/rope rings on the outside. This will save you headache in the next step.


To ensure optimum alignment between the axle and side plate, I start by mounting one side plate to both axles. Keep the screws loose (Tighten snug and then back the screw up 2-3 turns), they will need some adjustment after the construct is assembled. Repeat for the second side plate. Once I had both side plates attached to the axles, I noticed my side plates weren’t square to the axles. Initially I was worried this was a mistake, but I believe it to be by design, so don’t worry if yours is the same. Slight angle doesn’t mess anything up about the completed build.

Note the angle in the side plates as described above
Next we will dry fit the Rope Rings and Washers. Our kit doesn’t need to be tied to the inside of a ship to keep it from rolling around, but I think the addition of the rings and washers is a nice way to add some detail to the kit. These simply screw into the pre-drilled holes on either side plate.
In the video, I take another detour here and sand the washers down before dry fitting them. As the washers come, they have coarse lathe marks. Whether done by hand or CNC, they are rougher than I’ve seen many other parts in my day. That being said, cleaning them up is not trouble. I build a simple jig in my vise by clamping a piece of pine upright, then mount the washer near the edge of the block with a cheap screw. Placing the washer on the edge of the block is important as it allows us to get a ~180 degree work area on the washer. I experimented with using a file and sandpaper, but the size of this part makes cleaning it difficult. For the initial clean up I opted for a Dremel tool with a coarse tapered drum. This made quick work of the ridges in the part and left me with a sandpaper-able surface to finish.


In retrospect, my only two dislikes (if you can call them that) are the state of these washers as they come and the split rings used as the rope rings. Everything else about this kit is nice, especially at the price point, but these two things give it a cheaper feel. BUT! It is a kit after all, and the experience of working through issues like cleaning up the washers was valuable for me as it got my brain working, so I’ll leave you to be the judge.


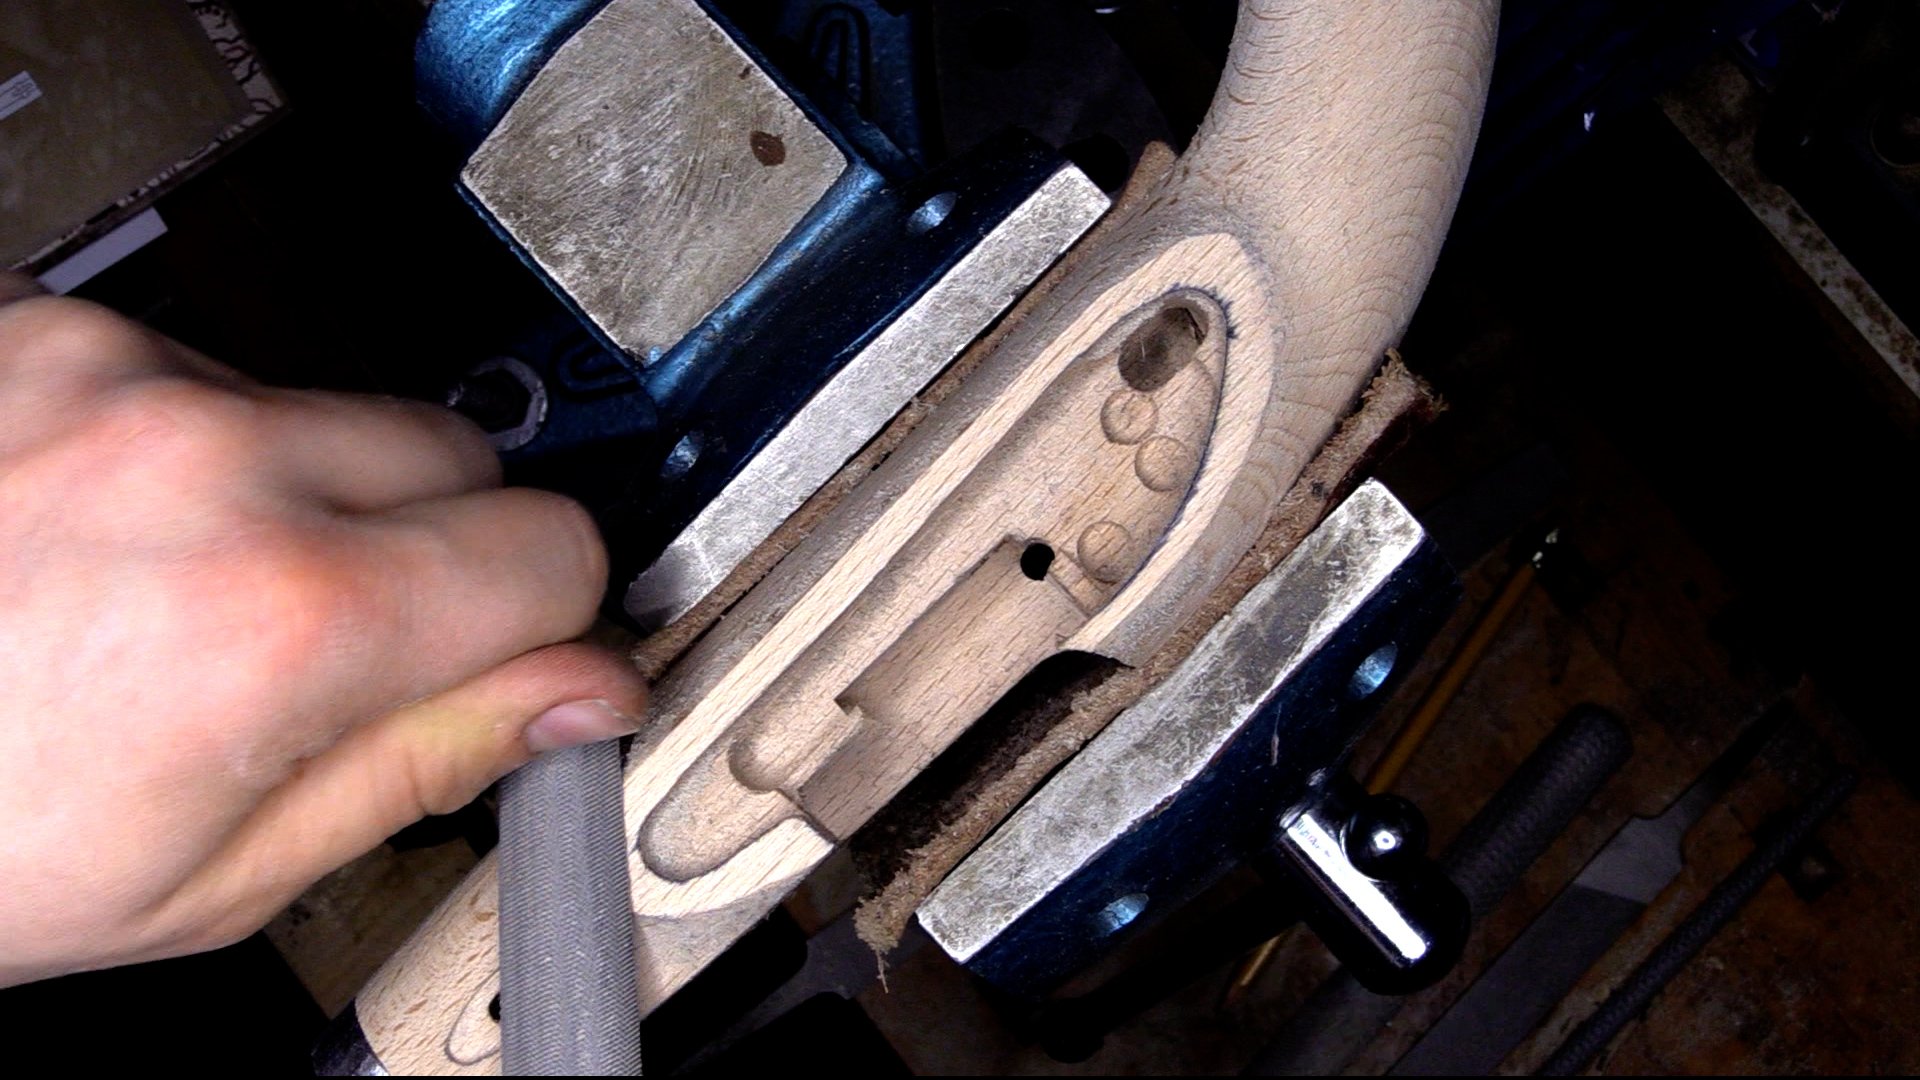
At 13:45 in the video we are ready for to mount our cannon barrel with the supplied iron straps. Set the cannon barrel onto the carriage, the lugs on either side of the barrel drop into the concave cuts in either side place. The balance may feel off but trust me it works, the cannon tail or breech will sit about halfway in the carriage with the barrel sticking out front. The weight of the barrel will keep it in place, but you may notice it tipping forward. Use a small block of wood or a junkmail catalog to prop up the front of the barrel will you set the straps. I rested mine on the table to the rear of my workbench.

The straps appear to be identical to me, but once I designate a strap for the right or left side, I want to keep it on that side just in case there is variation. Start on the left and drop a plate on top of the barrel lug. Make sure it is mated to the lug and there aren’t any balance issues (I didn't have any but its always good to check). When you have a even mate between the plate, lug and carriage, tape (or hold) the plate to the carriage and mark the screw holes for drilling. You don’t have a lot of wood to mess up here, so pay attention as you move forward.

I used an Al, but you can use a pencil (I don’t recommend a marker or pen as it is likely to bleed in this soft wood) to mark the center of each hole in the plate. With the plate held to the top of the carriage in it’s mating point, use your al or pencil to go through the plate hole and mark the center of each screw hole on the carriage. It is not crucial that the hole is in the exact center, but if you are more than 1/4 of the hole off the center, try remarking it.
Which tool should you use?
For much of my kit building time, I’ve really enjoyed using an al for marking like this. An al is simple and it is clean, but it is permanent. The point is fine enough that I can re-mark the center if I miss, but I focus on the task at hand and marking it right the first time. An al makes and indent in the wood which gives me a pilot hole for my drill bit, which is a nice added bonus.
A sharp pencil, especially a mechanical pencil will give you nearly the same effect.
If you are like me and have ‘non-perfect’ vision, you could also try tracing each hole with a pencil and then lining up your al or drill bit in the center of that traced circle.
I don’t mean to over complicated such a simple step here, but I felt it good to talk through it a little bit. Again, this is a simple kit that is hard to mess up, I’m sharing some of my thoughts because I think if you build this kit you’ll want to build some other kits as well.
Mark each of the holes in both the left and the right plates before removing the plates and barrel from the carriage. Get your preferred drill and your #54 drill bit ready. While doing that get a 2” piece of painters tape out so you can easily mark your depth on the drill bit. Next, find your top plate screws in your parts bin and measure them for length. You can do this with a ruler, micrometer, or simply hold the tips of one screw and the drill bit square to each other so that the screw is running in the same direction as the drill bit. You can do this by holding the drill bit and screw with your thumb and finger, or by setting both on the bench. Using the strip of painters tape, draw an imaginary line from the base of the screw head to the drill bit and place your painters tape perpendicular on the drill bit so that the tape covers the area of the drill bit that will not interact with the screw. This is a rudimentary depth gauge for your drill bit. As you are drilling, you will drill to the tape on your bit and then reverse your drill out of the hole.


This trouble can be avoided with a drill press that has an adjustable depth gauge, something everyone should have, but I understand that there can be more pressing matters in one’s life than a drill press.
With your pilot holes drilled, you can screw your top strap screws through the plate and into the side plates. Be sure you have the correct size screwdriver for this task as it will keep you from marring your screws.
Now that the cannon is assembled, it could be done if you wanted it to be. At this point, you can fit your wheels and take this thing out to the range and have fun.
However, with a kit, the finishing is half the fun in my book. As per our instructions, we’re going to take all this apart and practice our wood and metal finishing techniques. Time to get out your aprons and safety glasses folks.
First I want to dive into wood finishing. Our wood will take a little longer to dry, so starting with it can help us keep our time in check. I like chamfered edges on pieces of wood and this cannon kit is no exception. Using a small carving knife, I use my thumb and my hand to chamfer all of the edges of the wooden parts. I’m not removing a lot of wood here, just enough to give us a nice crisp edge around the pieces. This will “dull” the corners and give us a little handmade look as well as some practice with our knife.


In the video, you can see how my hands work together to accomplish this process. Thanks to my father, I’ve been carving with hand tools since I was a boy, so the process is second nature to me. As my father says, there’s nothing better than nice wood and a sharp knife.
I want a similar look on the wheels, but the grain structure was giving me fits. I took the wheels to the drum sander for a quick fix that looks good enough to keep us moving.
Our wood is now ready to stain. I’m using “Verathane” brand stain with the “Gunstock” color. I like this color as a simple, natural color that isn’t too weird. In my experience, it works well with the European Beech many of these kits are made of. With a rag, I coat all the wood pieces and set them in the sun to dry.

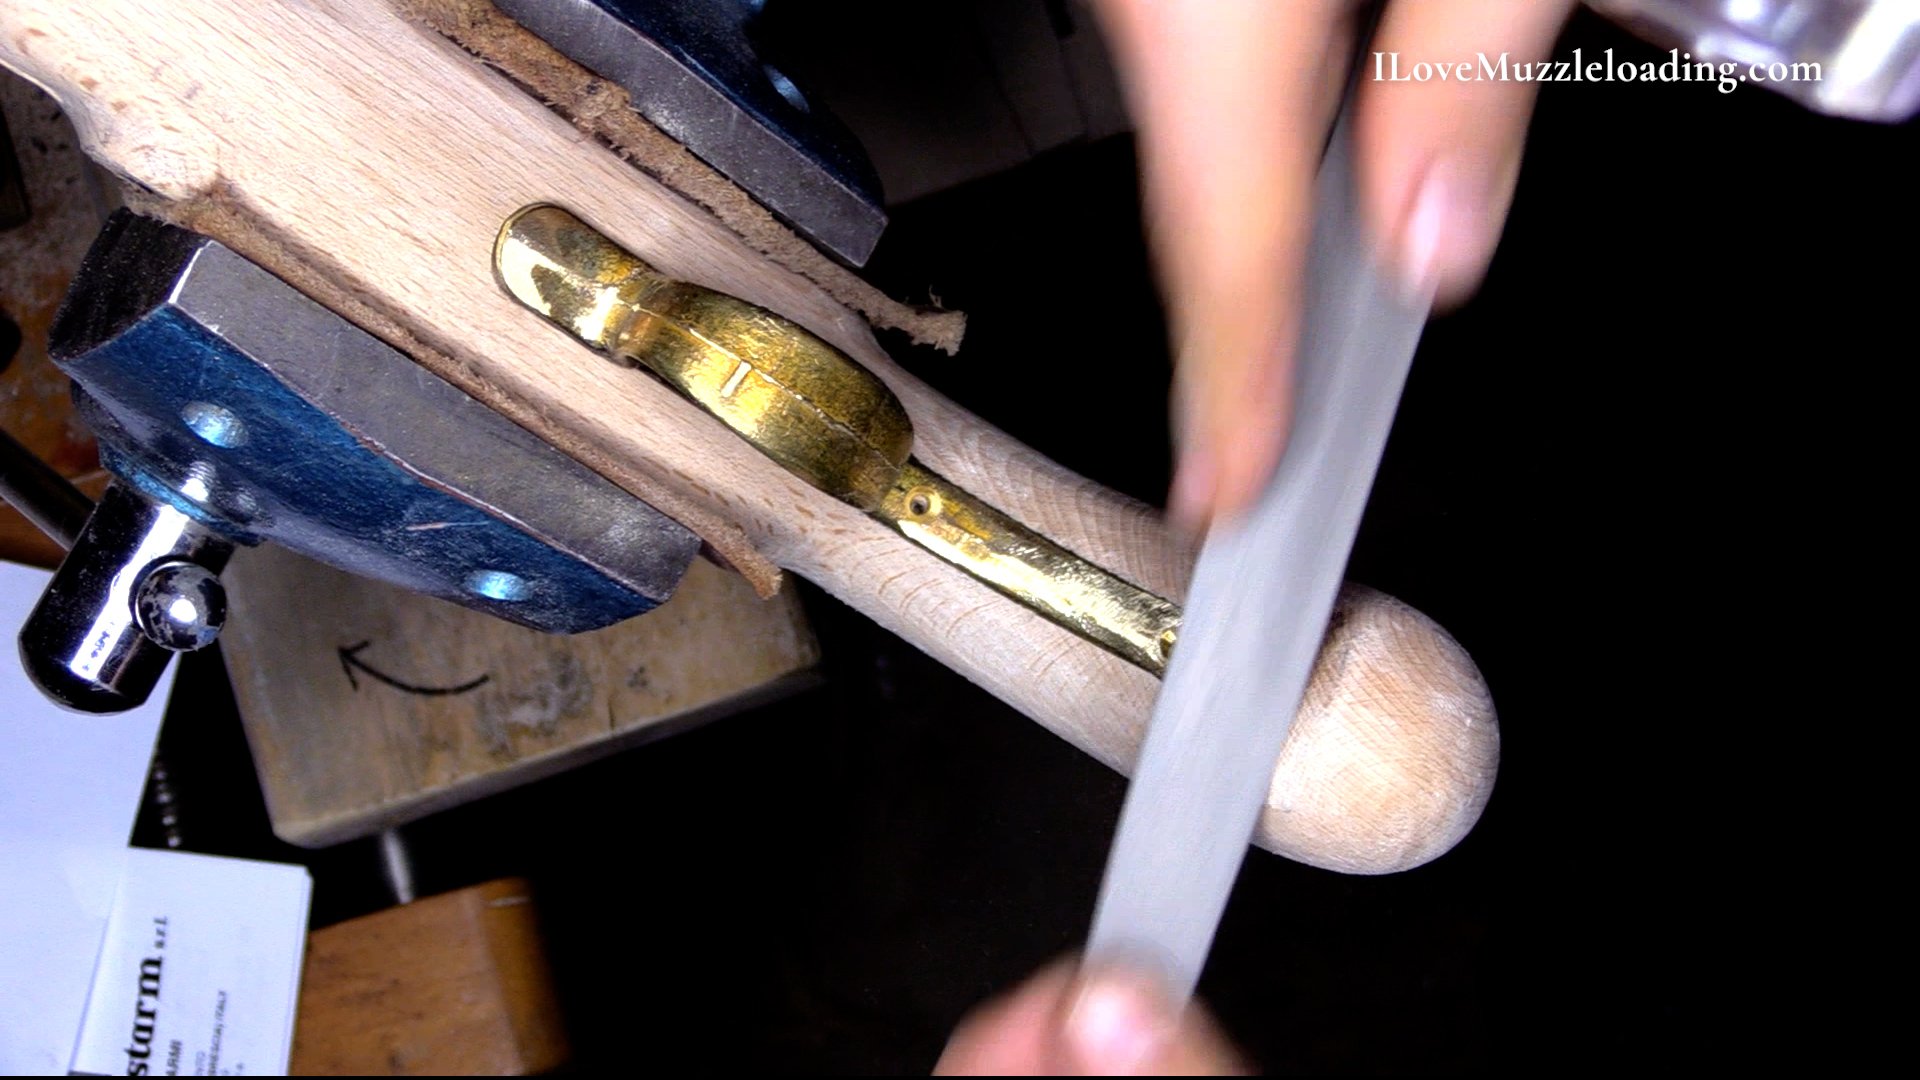
Our metal pieces will take a little bit more work to finish, thankfully none of the parts are as rough as the washers we cleaned up earlier so this will be simple. Using my vice, I use a combination of a fine flat file and some 320 grit sandpaper to get each of the metal pieces to a fine satin finish. Each of the pieces, apart from the barrel, took about 2 minutes to get cleaned up. This 2 minutes is a small price to pay and gives us a much nicer looking finished product. Don’t skimp on your sanding!

As a rule, I try to chamfer all the edges when I can.
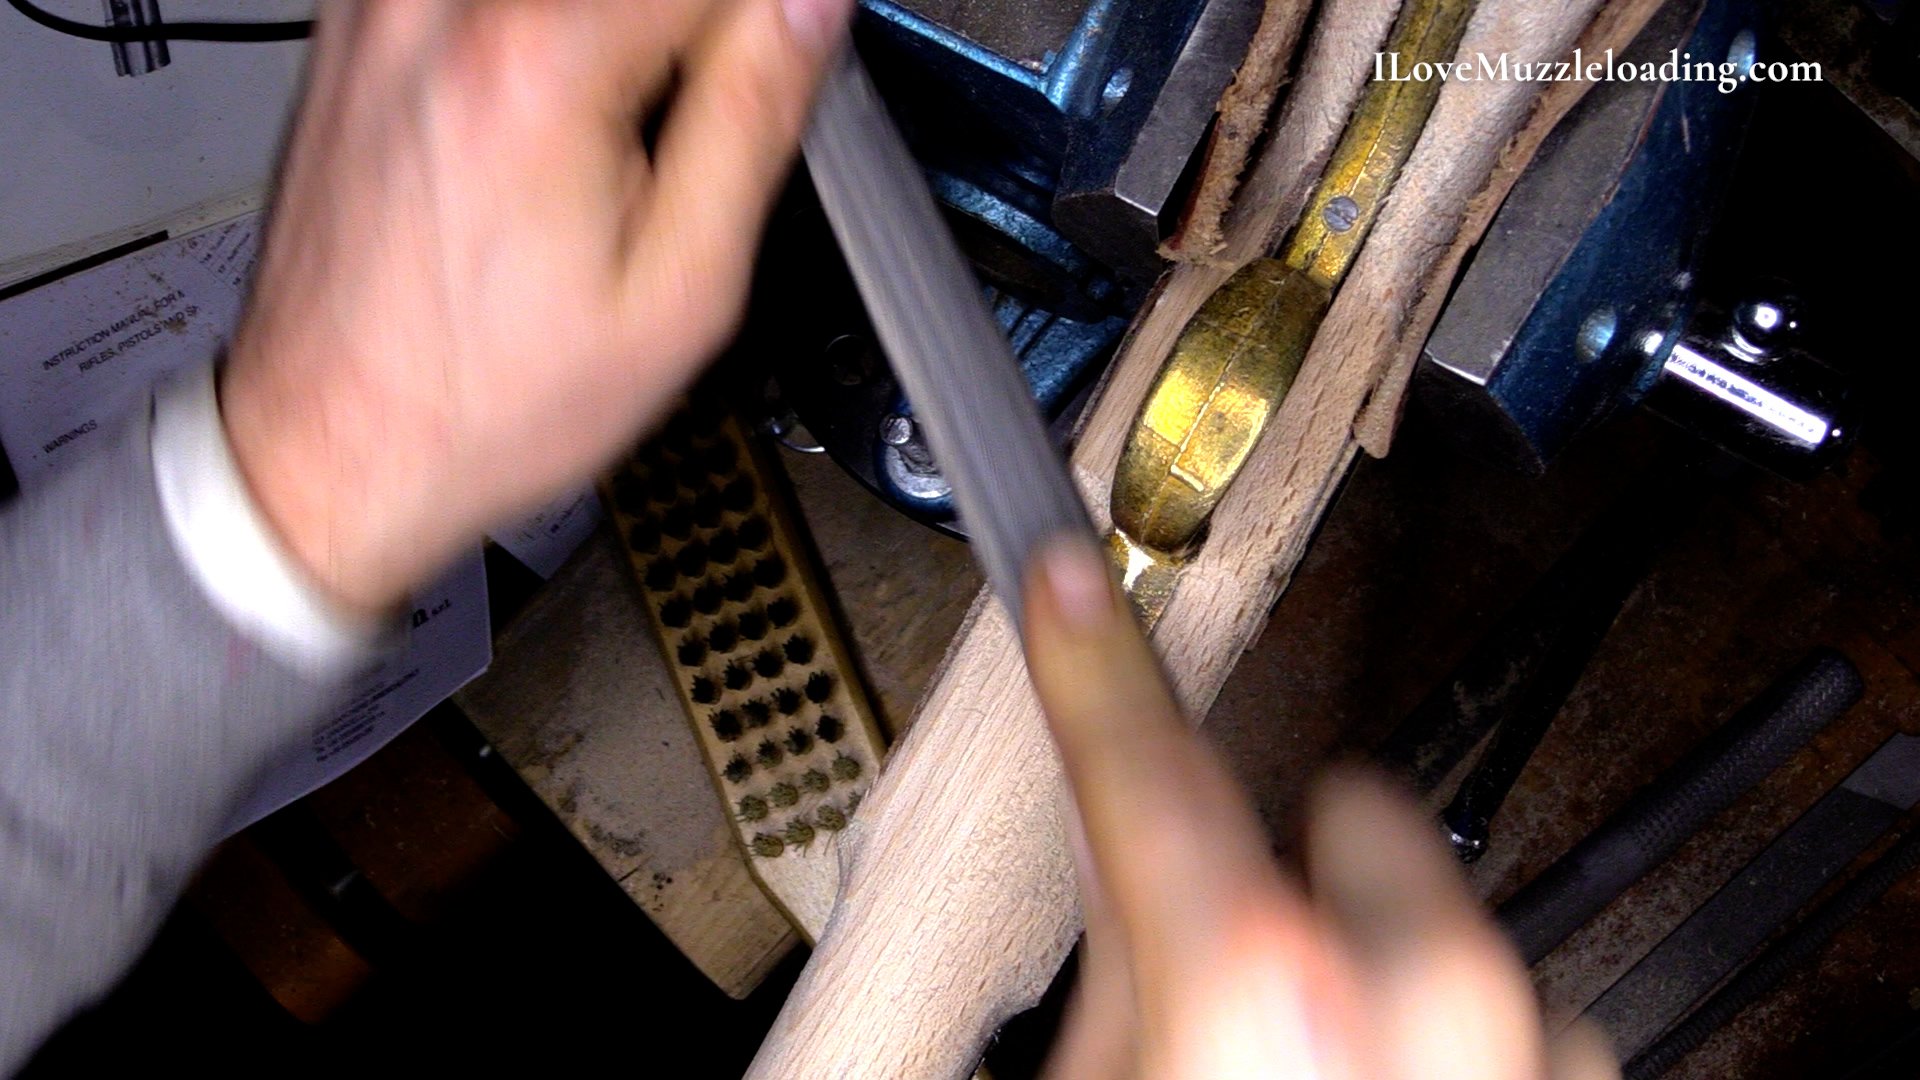
The Barrel is a different story. This piece is the focal point of this whole project, we want it to look good. I saved the barrel for last so I would be “warmed up”. With a piece of thick leather in my vice, I grip the muzzle of the barrel in the vise and start working the rear end. Much of the barrel is round, so I use sandpaper in a quick fashion by draping the paper over the barrel, perpendicular to the muzzle , stroking it back and fourth like a cartoon character drying off with a towel after a bath.


This is a simple, fast way to work these round parts of the barrel. I continue this process from the rear to the front of the barrel, making sure I get the underside as well. You may find it beneficial to rotate the barrel in 45 degree increments while you sand like this to make sure you don’t miss a spot. If you miss a spot, not only will it look odd, it will most definitely show when you apply finish to the barrel.
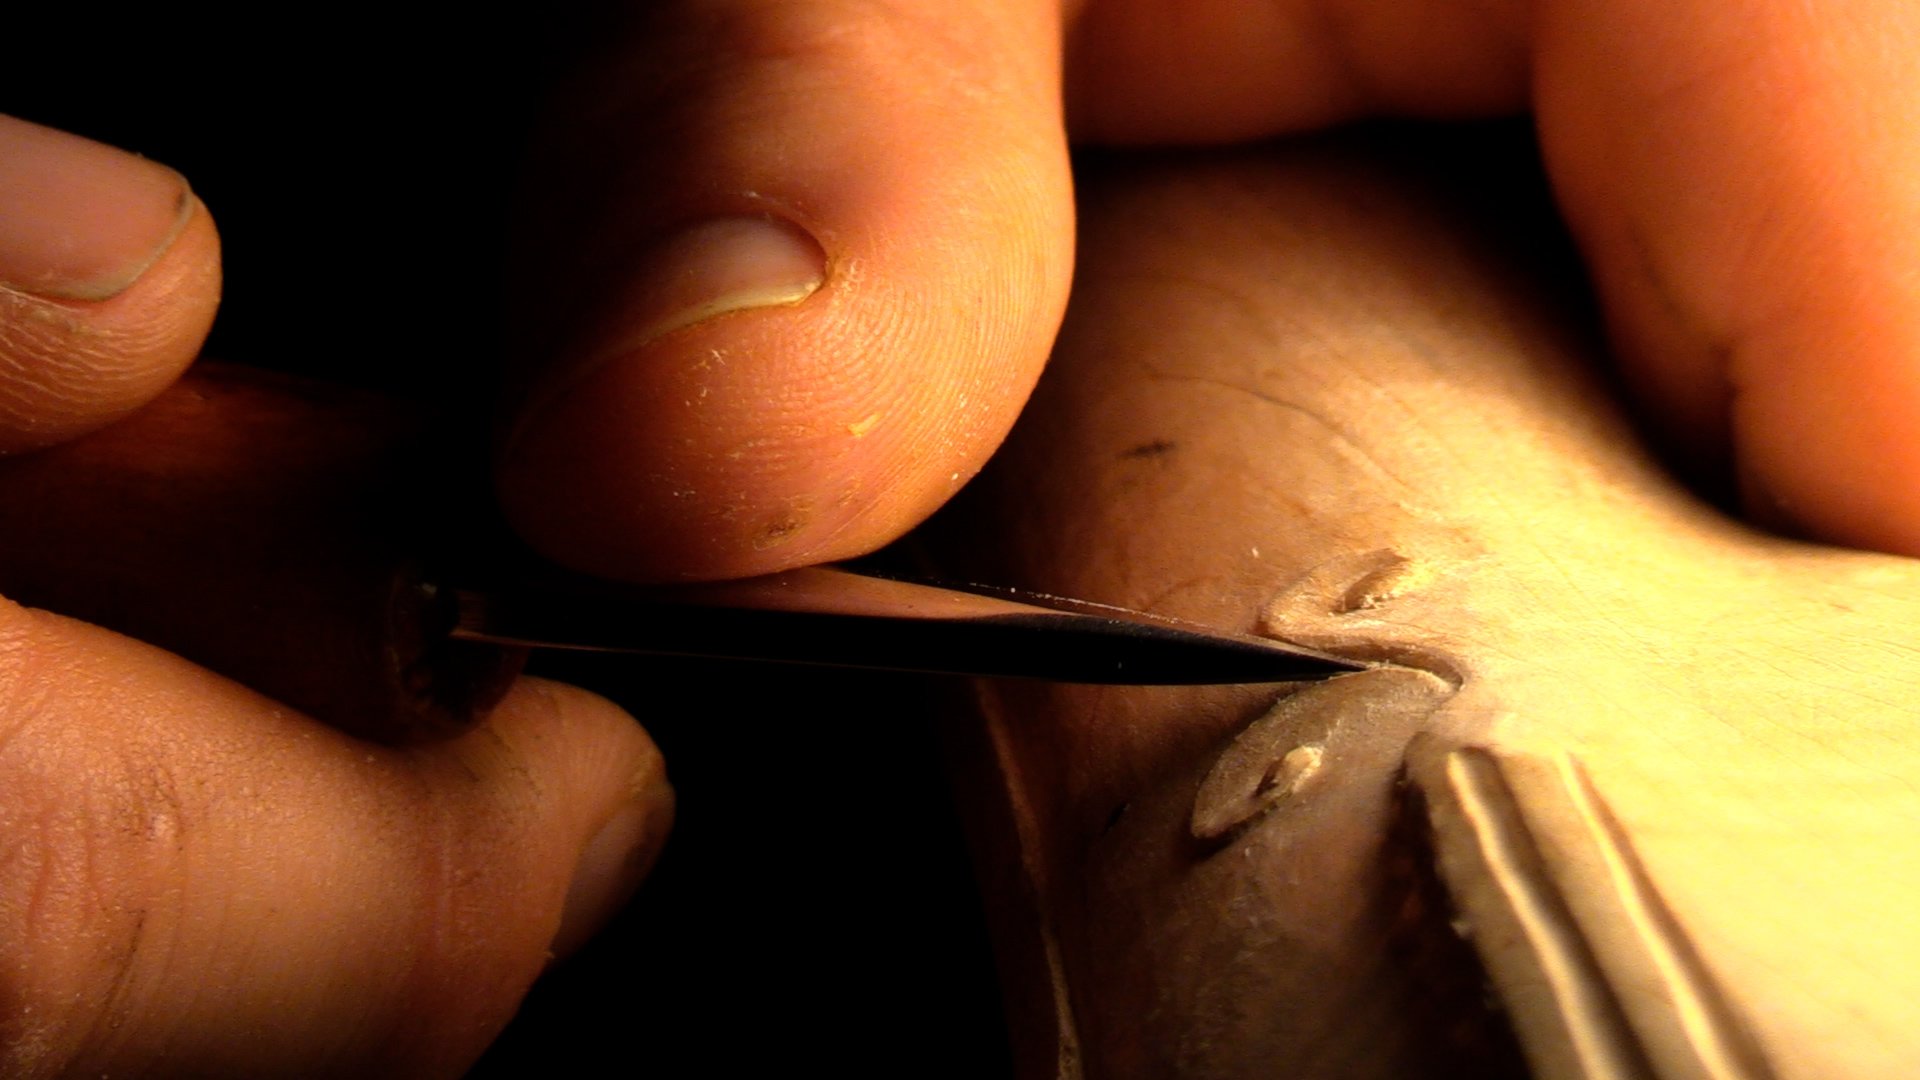
Two spots of the barrel will require elbow grease, the breech and the pins in the middle. Starting with the breech end, point the muzzle straight down in your vise so you can see all of the breech at once. I found the breech too small to work with just sandpaper, so I used the “File backed sandpaper” technique to work this area evenly. File-backed sandpaper is when you place a file behind or on top of your sandpaper using the file as a spine for the paper. This gives you more control and some structure to your cuts. This technique is common when working barrel flats because you can easily preserve the detail of the piece you are working. The small “tail” at the rear end of the cannon is a little tricky, but by backing my paper with a small rat tail or half-round file, you can
The second “trouble” spot is the center of the barrel with it’s arms. The best way I found to clean up this area is slowly with our file backed sandpaper. You will want to use a rat tailed half round file if you have one, or a narrow flat file for this area. The flat face of the file will help you keep an even finish and the point or narrow end of the file, depending on what you are using, will help get you into the small tight areas on the barrel. This area will slow you down considerably compared to the rest of the kit, but that’s okay. Slow down and enjoy the process. The time you spend on this part will pay off both in the final look and teaching you a bit about complex part cleanup.

Once the barrel has an even finish all around, I rubbed it with a maroon scotchbrite to blend the areas together. I found that my sandpaper direction was very visible after sanding, using the scotchbrite broke up those directional sanding lines and make the piece one texture throughout.
Away from the vise now, we need to ‘de grease’ these metal parts so our finish goes on evenly. I’ll be using Brownell’s Oxpho Blue for the hardware, it notoriously shows unevenness in my experience so we need to be on our game here. To degrease the hardware, I’m putting on rubber gloves and using nail polish remover with a paper towel. Wet the towel with the remover and gently scrub your hardware pieces, being careful to see them on a clean surface to dry when done. From here on out, we don't want to touch these parts with our bare hands, one touch can leave a oily mark that will create trouble for our finish. After a few minutes the nail polish remover has evaporated and we can begin applying finish.


Next, prepare your area to apply the cold bluing solution. I set a clean piece of paper on my bench to protect the parts and then I get 5-6 cotton swabs ready and set them to the side. The cold bluing solution eats at these cotton swabs, I find that it’s good to replace the swab every 5 minutes or so to apply a clean even finish.
When applying solutions like the Brownells Oxpho Blue, it’s important to never work from your container. If you dip from and back into your solutions container, your run the risk of contaminating the solution and ruing a whole bottle. The best practice is to pour out a small amount of solution into a disposable container like a plastic cup or cleaned cottage cheese container.

Always follow the directions of the solution you are using as they are listed on the bottle. For this bluing solution, we want to apply an even coat, let dry, and then rub with steel wool or scotchbrite. I wanted a darker color, so I applied 3 coats and rubbed them gently to retain the darkest color I could.
In my experience, there can be areas of the hardware that don’t take the solution as easily as others, this can be a result of grease on the metal, inconsistent sanding, or a symptom of the composition of the metal. Try applying 2 coats of the solution to see if the spot will take color. If the pot remains bright or different, hit it with your sandpaper for a few strokes and then try applying the solution. Usually a little buffing with sandpaper does the trick and gets you back on track.

After your solution is dried to the color you want, it’s time to reassemble all of the parts. Be sure to tighten all of your screws down to keep your parts from shifting. Remember, this is going to be rocked by recoil and you don’t want anything falling apart. For those of you wanting to go on to build pistols and rifles, make sure all of your screw heads point in the same direction for added detail.

The last assembly step is to pin your wheels to the axles. Place your wheel over the axle, then the washer. Insert your pin from the top and fold each tail to the side. When this is complete, your pin should have a leg going to the right and the left as you hold it in your hand.

Pins mid-fold
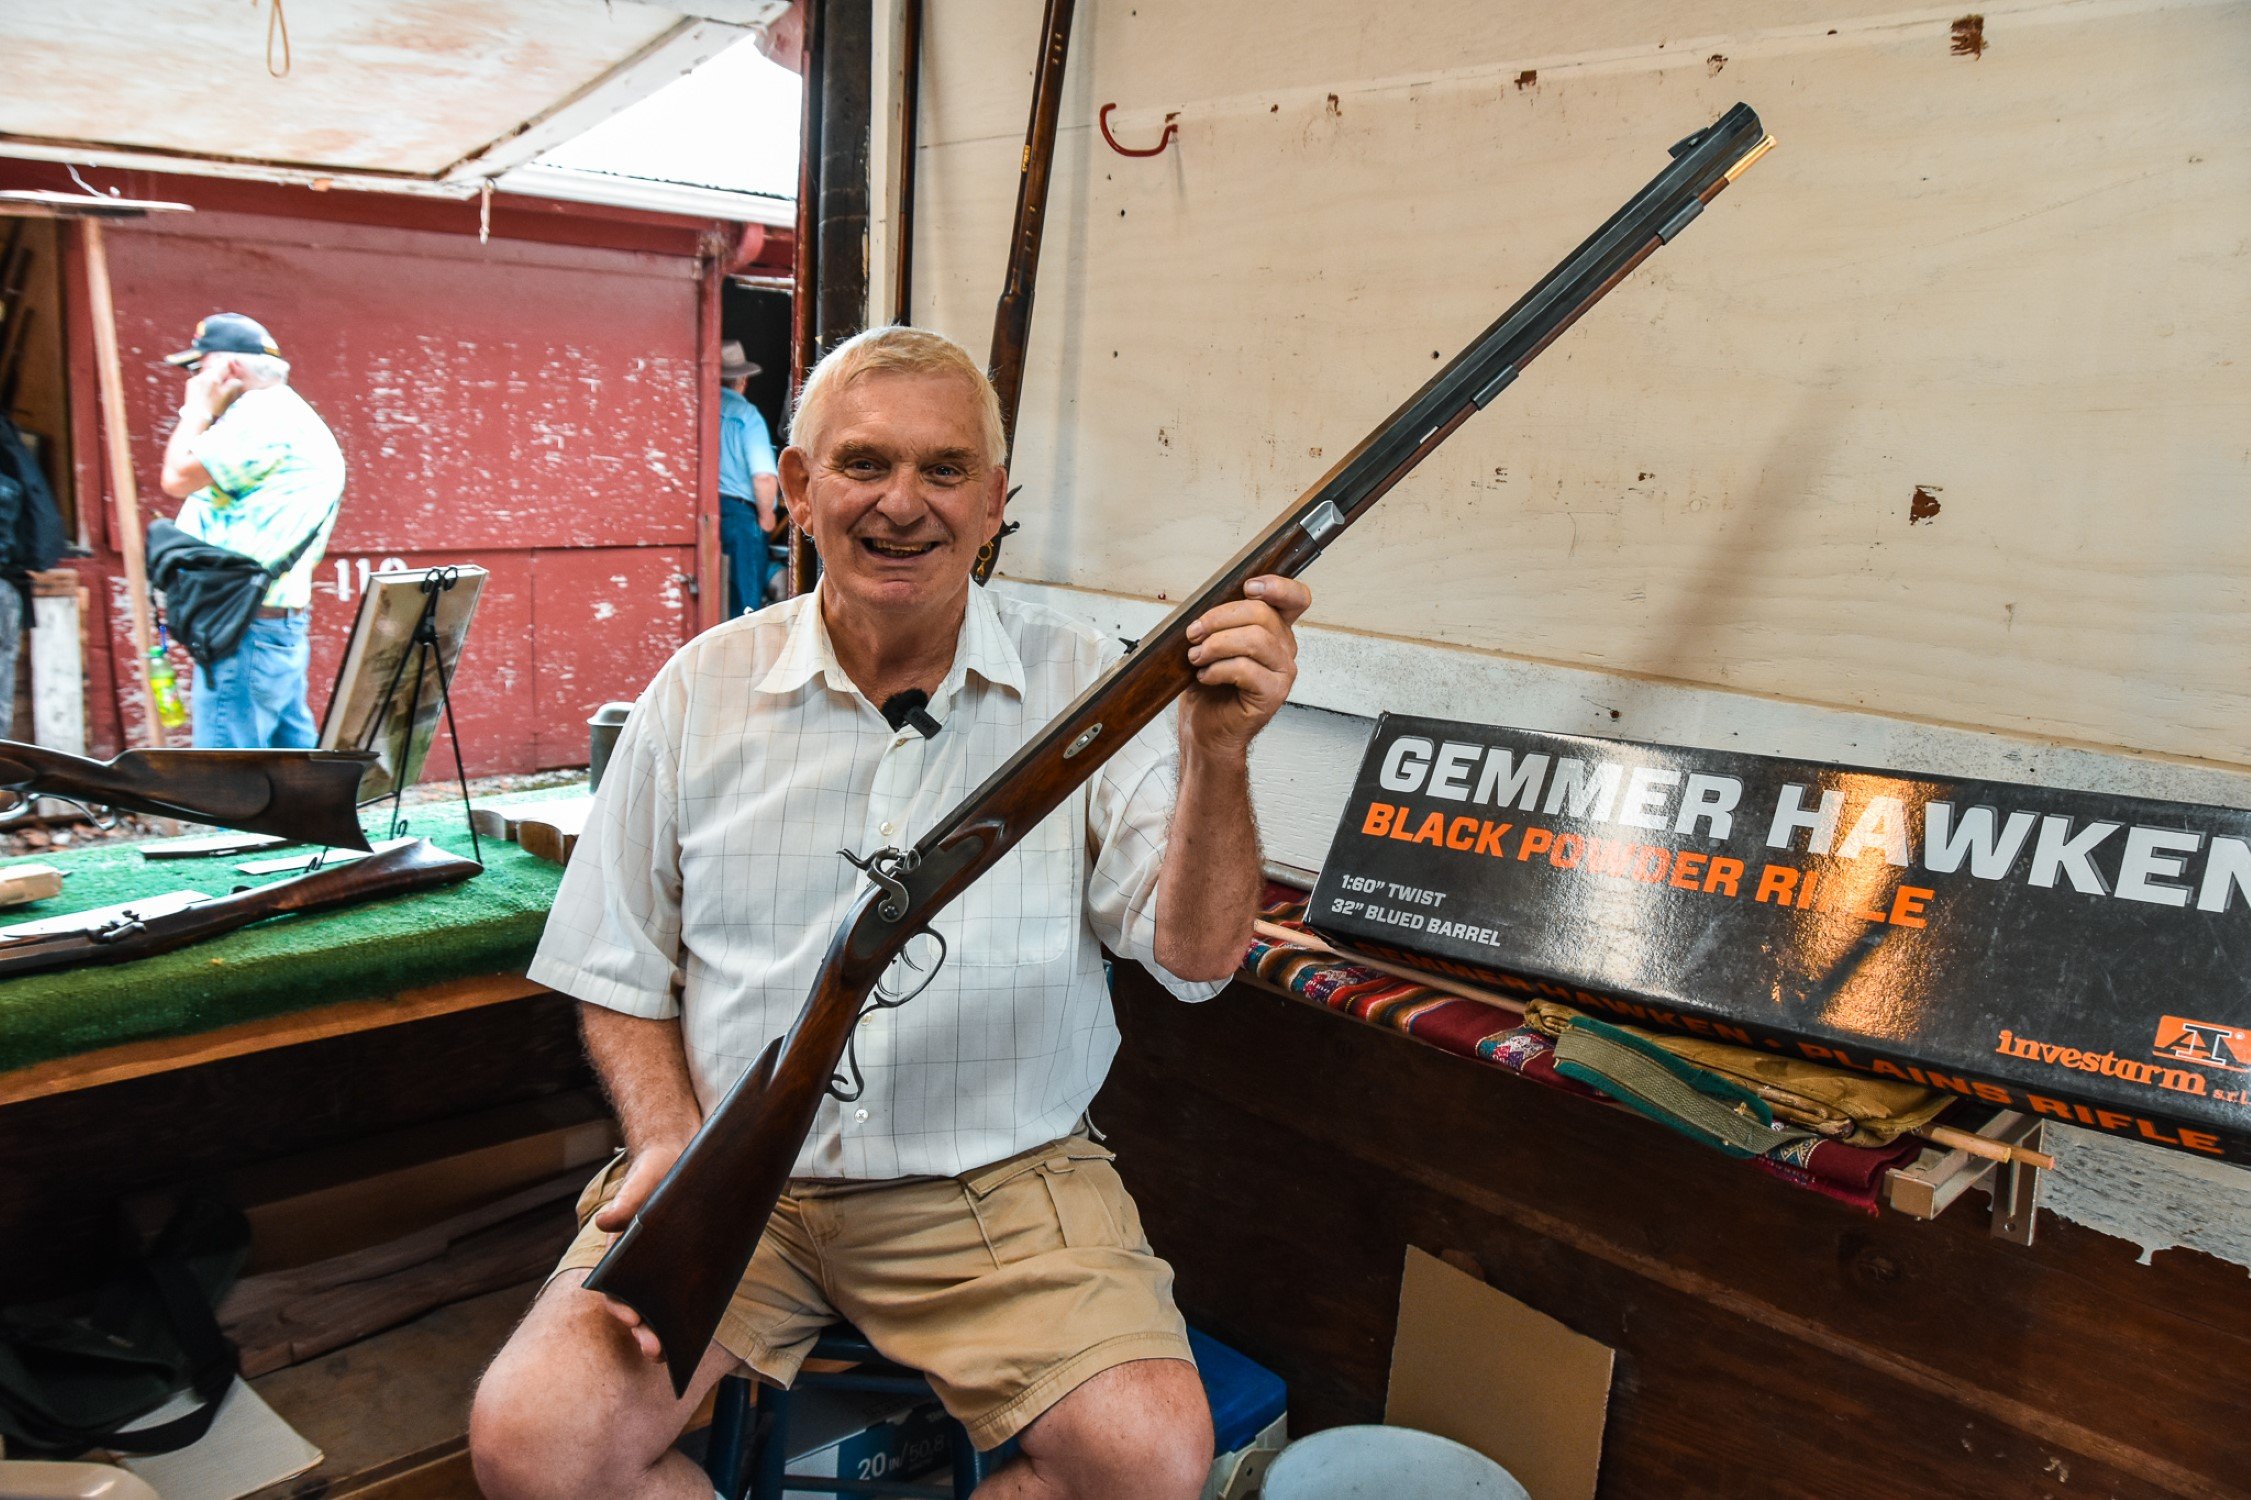
As a final-final step, I wanted to add a little grime to the kit to give us some color contrast on the carriage. This could be done before you mount the hardware, but I think it’s fine to add it at this stage. Much like our “Investarms Gemmer Hawken” Build series, I’m going to use some Kibler Bone Black to get some texture on the carriage.
In a clean plastic container, I dribble out a quarter coin-sized area of bone black and mix it with some Danish oil. I don’t want the brush to be sopping wet, we want to apply this with a ‘dry brush’ technique, meaning the brush is a little dry and leaves marks on the wood. After I have a good feeling mixture, I take to applying the black to the kit. This is an extra step, but I like the look of it personally. If you don’t like it, don’t apply it to yours. My philosophy in applying this to any kit is to apply it in areas of wear on the wood to simulate use and give a natural change in color. On this cannon kit, I focus on applying bone black to the wheels, under side of the carriage, and the bottom half of the sides of the carriage. This gives us a couple of things, first, it gives the kit some age and visual interest. Second, the bone black applied in this manner gives the piece “depth” by exaggerating the changes in planes of shape. The bottom of the kit will receive less light when setting on a table, adding the black in these darker areas gives us more contrast. It’s an old trick I learned in school and enjoy applying to muzzleloaders to this day.
When done with your bone black, give the carriage a coat of clean oil and let dry.
If you don’t want to use bone black, it’s good to give the carriage a coat of clean oil to fill the pores in the wood, just like you would on a muzzleloader stock.


After the oil soaks into the carriage, you can call yourself a cannon builder because your kit is done. Now’s the time to read the manual and get ready to take this little piece of artillery to the range for some fun. I hope you’ve found this tutorial informative and helpful in your own kit-building experience.
If you would like to follow along in more kit builds, check out some of the articles below to join me in the shop.